Tuesday, April 19, 2011

Quick 'n Easy Easter Cards


I downloaded the free Victorian Easter images, printed them on card stock, added a little bling and/or ribbon and there you have it - instant cards!

Monday, April 18, 2011

So-called "Hello Kitty" Card

My hubby deemed this my "Hello Kitty" card. LOL!
I used cotton balls and ink pads to create the multi-colored background, then spritzed it with water and set it with a heat gun. I then added another layer of the same formula behind the black frame.

Wednesday, April 13, 2011

I'm always amazed by embossing powder...

I created the flourish background with a repeated stamped image using versamark ink on cream card stock. I used white embossing powder over the versamark, heated it to emboss, then rubbed a cotton ball dabbed in blue ink over the embossed images to create the greenish colored background. (Use an old towel or a paper towel to rub the ink off the embossed flourishes to remove excess ink.) I added the flowers, ribbon and a gem to complete the card.

Monday, April 11, 2011

New Supplies

 Used a new sponge applicator to apply the two colors on and around the kitten. To me it looks
like we're peering back at her through our own oval window.
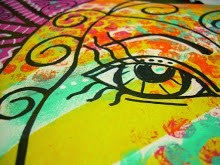
 Use my new Tim Holtz Mask to mask off the printed paper, then applied the black ink with the sponge applicator leaving a little room for a message at the top right of the card. I used Glossy Accents to make the little "pearls", let them dry and then went over them with markers to add color.
Same square sponge applicator applied without swirling the sponge to soften the edges.
Just ink it and press down. The sponges are, obviously, rectangular!

This was a VERY quick Saturday morning "I have and idea in my head and I have to get it out" card.
It didn't turn out as well as I hoped, but now I can improve on it.
I love the new color box inks and the Tim Holtz mask.

Friday, April 1, 2011

Pink Happy Mother's Day

I was cleaning my office and going through an old "supplies" box and found a scrap of this paper. It had Mother's Day written all over it - so to speak! I printed the message, cut it out with my new circle cutter and attached it with glue dots. Since I'm mailing this one, I couldn't use dimensionals...