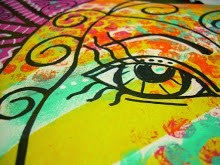
Wednesday, October 29, 2014

New "Envelope" Gift Card Holder


I found a tutorial last night on this cute little gift card holder. It was easy and a pretty quick project.
The base is a standard card envelope folded in half. 

I loved the idea of the Brad and baker's twine closure! 

Monday, October 27, 2014

Pink Happy Birthday

Just another birthday card...this time using a technique called "Fork Bows". You run ribbon through the tines of a fork and tie a knot and voila - a nearly perfect bow.

Thursday, October 23, 2014

More in-flight work


THese are both watercolor pencils and a waterpen for blending with black sharpie and touches of white paint pen.

In-flight Journal Page


Talk about simple. I used brush markers to do the colored blocks in the background, then drew the face with a black sharpie and colored in the empty space next to the head. Then I added some bits of white paint pen. Amazing what you can do while on a flight!

Colorful Journal Page


This page started with three solid acrylic inks, then stamped over with bubblewrap in the same three colors. Next I drew the face and the hair, I colored in the empty space to the left of the head with pink (something new for me) and decided it was too bland so I added the lines and doodling. I used the back end of a paint brush to add the dots.

Thursday, August 21, 2014

Womans Face over Painted Background

I absolutely LOVE this journal page! I had done a background a while back. I wasn't thrilled with it, but last night I added the face to it and painted the black around it, added some highlight and WOW! Now it's my new fav! Thank to Jule Fei-Ban Balzer I tried this technique and was successful! I owe this page to her daily blog e-mail.

Thursday, August 14, 2014

Don't Wait for Someone to Bring You Flowers - Journal Page


I had SO much fun making this page last night. I used 3 acrylic paints (orange, teal and yellow) and scraped them onto the page with an old credit card. Then used my fingers to smear some of the paint. I then applied some of the same paints to a piece of bubble-wrap and pressed it onto the page in a random fashion. The flowers and stems were from a card-making kit I had made up for a friend who used to babysit so she and the kids could make cards for the parents. The circles that adorn some of the flowers are from a bag of quilling materials I had in my stash of craft goodies. I added some white circles on the dots with a white gel pen and then wrote the message on the stems. If you look closely you'll see the words "DON'T WAIT" on the petals of the large flowers.

Wednesday, July 30, 2014

Play - Journal Page


The message says it all!

New Cards

Stenciled hummingbird, pre-printed paper background, stamped sign.
Real Sprinkles, Cotton Frosting and an actual cupcake wrapper.

Monday, July 21, 2014

Splatter Painting

So I was looking at yet another webpage on art journaling, this one on splatter painting, the other day and thought "That looks easy. I could do that!" So, after a few attempts at splattering paint everywhere, and I do mean everywhere...I did my first splatter painting. It was too dark, too heavy with paint and not at all acceptable. So, I tried some more test splatters and was satisfied with the results. I pulled out a piece of white card stock, splattered some green paint on it (all of the green in the background is splattered) and then dabbed paint on top of it with a small paint brush to look like flowers. And Voila! Not bad for the second attempt! Woo hoo! I cut it down and put it in an old plastic box frame. I hate to admit that I admired it all weekend. It reminds me so much of going to museums to see the impressionist artists paintings and wondering how they could make dots and splats of paint look like flowers. Now I get it! It brought back such great memories!